Build Predictive Machine Learning with Flink | Workshop on Dec 18 | Register Now
How to Use Schema Registry and Avro in Spring Boot Applications
TL;DR
Following on from How to Work with Apache Kafka in Your Spring Boot Application, which shows how to get started with Spring Boot and Apache Kafka®, here I will demonstrate how to enable usage of Confluent Schema Registry and Avro serialization format in your Spring Boot applications.
Using Avro schemas, you can establish a data contract between your microservices applications.
The full source code is available for download on GitHub.
| Version | Date | Date |
| v1.0 | 7/31/19 | Initial revision |
Prerequisities
- Java 8+
- Confluent Platform 5.3 or newer
- Optional: Confluent Cloud account
- To get started with Spring using a more complete distribution of Apache Kafka, you can sign up for Confluent Cloud and use the promo code SPRING200 for an additional $200 of free Confluent Cloud usage.
Let’s start writing
As always, we’ll begin by generating a project starter. In this starter, you should enable “Spring for Apache Kafka” and “Spring Web Starter.”
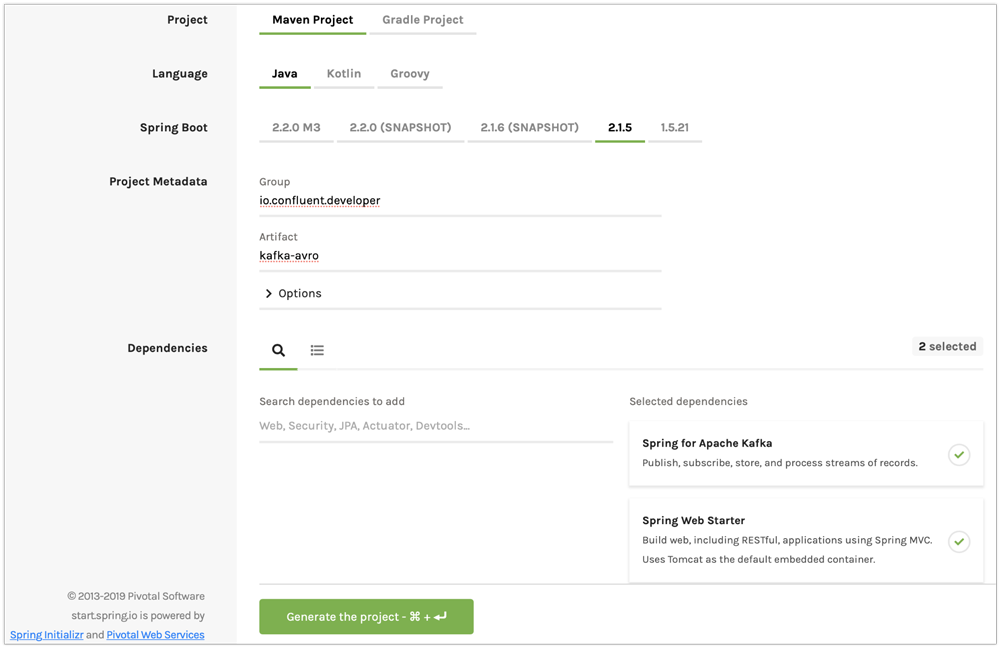
Figure 1. Generate a new project with Spring Initializer.
<project>
    <dependencies>
        <!-- other dependencies -->
        <dependency>
            <groupId>io.confluent</groupId>

<artifactId>kafka-schema-registry-client</artifactId>   (1)
            <version>5.3.0</version>
        </dependency>
        <dependency>
            <groupId>org.apache.avro</groupId>
            <artifactId>avro</artifactId>   (2)
            <version>1.8.2</version>
        </dependency>
        <dependency>
            <groupId>io.confluent</groupId>
            <artifactId>kafka-avro-serializer</artifactId>   (3)
            <version>5.2.1</version>
        </dependency>
        <dependency>
            <groupId>io.confluent</groupId>
            <artifactId>kafka-streams-avro-serde</artifactId>
            <version>5.3.0</version>
            <exclusions>
                <exclusion>
                    <groupId>org.slf4j</groupId>
                    <artifactId>slf4j-log4j12</artifactId>
                </exclusion>
            </exclusions>
        </dependency>
    </dependencies>
    <repositories>
        <!-- other maven repositories the project -->
        <repository>
            <id>confluent</id>   (4)
            <url>https://packages.confluent.io/maven/</url>
        </repository>
    </repositories>
    <plugins>
        <!-- other maven plugins in the project -->
        <plugin>
            <groupId>org.apache.avro</groupId>
            <artifactId>avro-maven-plugin</artifactId>
            <version>1.8.2</version>
            <executions>
                <execution>
                    <phase>generate-sources</phase>
                    <goals>
                        <goal>schema</goal>
                    </goals>
                    <configuration>
<sourceDirectory>src/main/resources/avro</sourceDirectory>   (5)

<outputDirectory>${project.build.directory}/generated-sources</outputDirectory>
                        <stringType>String</stringType>
                    </configuration>
                </execution>
            </executions>
        </plugin>
    </plugins>
</project>
- Confluent Schema Registry client
- Avro dependency
- Avro SerDes
- Confluent Maven repository
- Source directory where you put your Avro files and store generated Java POJOs
The architecture of a Spring Boot application
Your application will include the following components:
- use.avsc: an Avro file
- SpringAvroApplication.java: the starting point of your application. This class also includes configuration for the new topic that your application is using.
- Producer.java: a component that encapsulates the Kafka producer
- Consumer.java: a listener of messages from the Kafka topic
- KafkaController.java: a RESTful controller that accepts HTTP commands in order to publish a message in the Kafka topic
Creating a user Avro file
{
  "namespace": "io.confluent.developer",   (1)
  "type": "record",
  "name": "User",
  "fields": [
    {
      "name": "name",
      "type": "string",
      "avro.java.string": "String"
    },
    {
      "name": "age",
      "type": "int"
    }
  ]
}
- An avro-maven-plugin will generate the User POJO in the io.confluent.developer package. This POJO has name and age properties.
Creating a Spring Boot application class
@SpringBootApplication
public class SpringAvroApplication {

    @Value("${topic.name}") (1)
    private String topicName;

    @Value("${topic.partitions-num}")
    private Integer partitions;

    @Value("${topic.replication-factor}")
    private short replicationFactor;

    @Bean
    NewTopic moviesTopic() { (2)
        return new NewTopic(topicName, partitions, replicationFactor);
    }

    public static void main(String[] args) {
        SpringApplication.run(SpringAvroApplication.class, args);
    }
}
- These are the topic parameters injected by Spring from application.yaml file.
- Spring Boot creates a new Kafka topic based on the provided configurations. As an application developer, you’re responsible for creating your topic instead of relying on auto-topic creation, which should be false in production environments.
Creating a producer component
@Service
@CommonsLog(topic = "Producer Logger")
public class Producer {

    @Value("${topic.name}") (1)
    private String TOPIC;

    private final KafkaTemplate<String, User> kafkaTemplate;

    @Autowired
    public Producer(KafkaTemplate<String, User> kafkaTemplate) { (2)
        this.kafkaTemplate = kafkaTemplate;
    }

    void sendMessage(User user) {
        this.kafkaTemplate.send(this.TOPIC, user.getName(), user); (3)
        log.info(String.format("Produced user -> %s", user));
    }
}
- A topic name will be injected from application.yaml.
- Spring will initialize KafkaTemplate with properties provided in application.yaml.
- We will send messages to the topic using User as the key.
Spring instantiates all these components during the application startup, and the application becomes ready to receive messages via the REST endpoint. The default HTTP port is 9080 and can be changed in the application.yaml configuration file.
@Service
@CommonsLog(topic = "Consumer Logger")
public class Consumer {

  @Value("${topic.name}")   (1)
  private String topicName;

  @KafkaListener(topics = "users", groupId = "group_id")   (2)
  public void consume(ConsumerRecord<String, User> record) {
      log.info(String.format("Consumed message -> %s", record.value()));
  }
}
- The topic name will be injected from the application.yaml.
- With the @KafkaListener annotation, a new consumer will be instantiated by the spring-kafka framework.
Creating the KafkaController component
@RestController
@RequestMapping(value = "/user") (1)
public class KafkaController {

  private final Producer producer;

  @Autowired
  KafkaController(Producer producer) {   (2)
      this.producer = producer;
  }

  @PostMapping(value = "/publish")
  public void sendMessageToKafkaTopic(@RequestParam("name") String name, @RequestParam("age") Integer age) {
      this.producer.sendMessage(new User(name, age));   (3)
  }
}
- KafkaController is mapped to the /user HTTP endpoint.
- Spring injects the producer component.
- When a new request comes to the /user/publish endpoint, the producer sends it to Kafka.
Running the example
Prerequisites
Tip: In this guide, I assume that you have the Java Development Kit (JDK) installed. If you don’t, I highly recommend using SDKMAN! to install it.
You’ll also need Confluent Platform 5.3 or newer installed locally. If you don’t already have it, follow the Confluent Platform Quick Start. Be sure to install the Confluent CLI as well (see step 4 in this section of the quick start).
Start Kafka and Schema Registry
confluent local start schema-registry
The Confluent CLI provides local mode for managing your local Confluent Platform installation. The Confluent CLI starts each component in the correct order.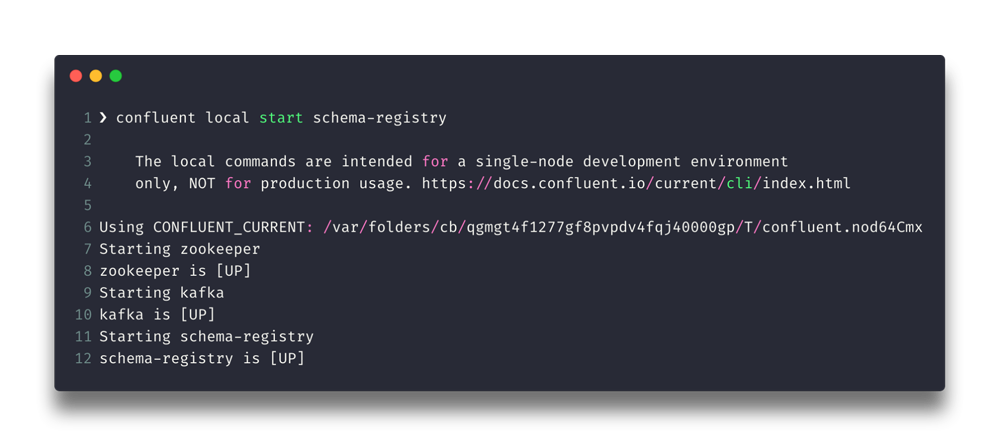
You should see a similar output in your terminal.
Building and running your Spring Boot application
In the examples directory, run ./mvnw clean package to compile and produce a runnable JAR. After that, you can run the following command:
java -jar target/kafka-avro-0.0.1-SNAPSHOT.jar
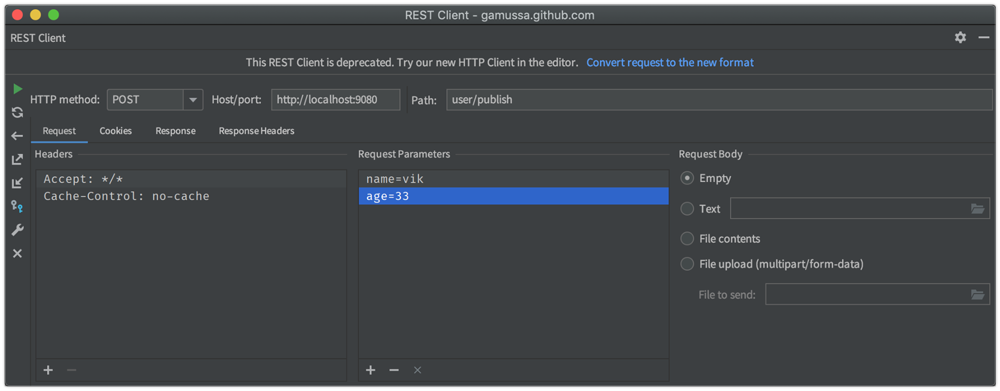
Testing the producer/consumer REST service
For simplicity, I like to use the curl command, but you can use any REST client (like Postman or the REST client in IntelliJ IDEA to):
curl -X POST -d 'name=vik&age=33' http://localhost:9080/user/publish
2019-06-06 22:52:59.485  INFO 28910 --- [nio-9080-exec-1] Producer Logger                          : Produced user -> {"name": "vik", "age": 33}
2019-06-06 22:52:59.559  INFO 28910 --- [ntainer#0-0-C-1] Consumer Logger                          : Consumed message -> {"name": "vik", "age": 33}
Running the application using Confluent Cloud
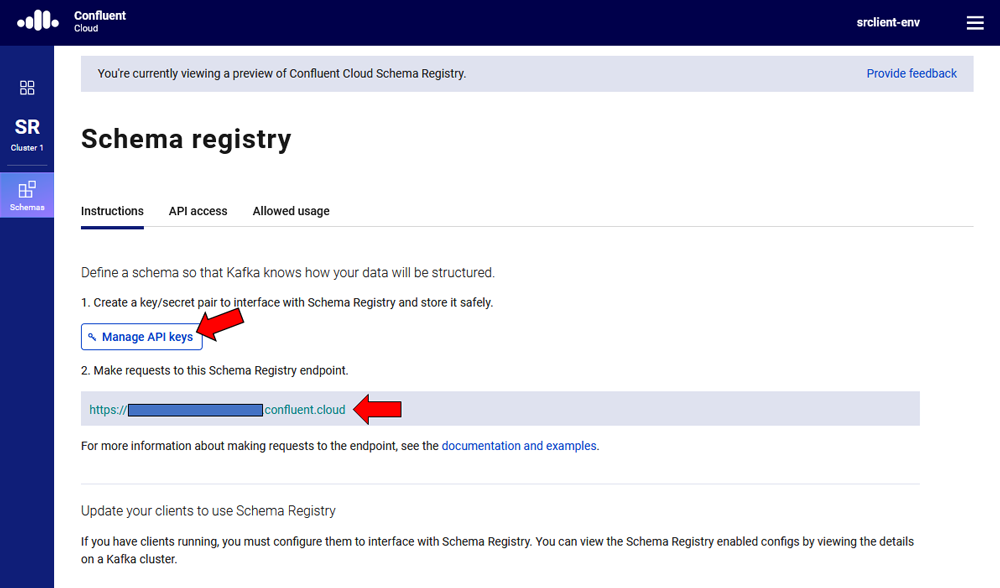
To use this demo application with Confluent Cloud, you are going to need the endpoint of your managed Schema Registry and an API key/secret. Both can be easily retrieved from the Confluent Cloud UI once you select an environment.
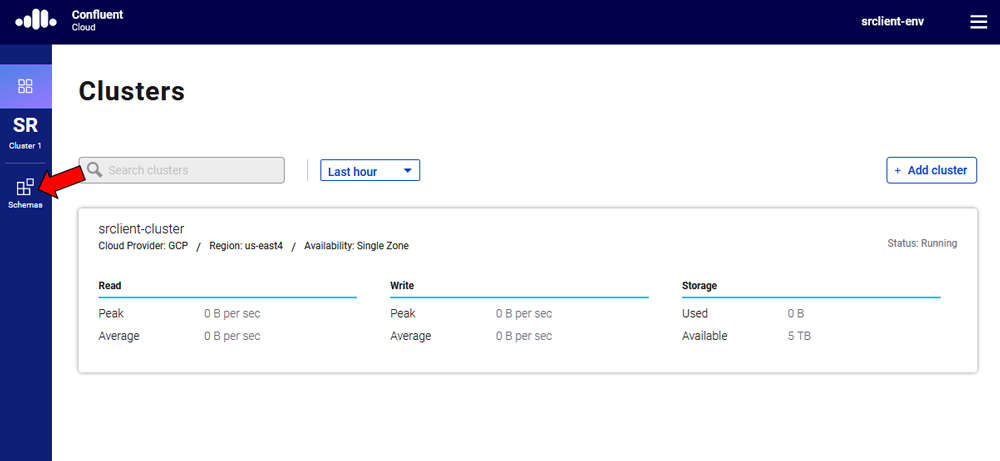
At least one Kafka cluster must be created to access your managed Schema Registry. Once you select the Schema Registry option, you can retrieve the endpoint and create a new API/secret.
An example Confluent Cloud configuration can find in application-cloud.yaml:
topic:
  name: users
  partitions-num: 6
  replication-factor: 3
server:
  port: 9080
spring:
  kafka:
    bootstrap-servers:
      - mybootstrap.confluent.cloud:9092   (1)
    properties:
      # CCloud broker connection parameters
      ssl.endpoint.identification.algorithm: https
      sasl.mechanism: PLAIN
      request.timeout.ms: 20000
      retry.backoff.ms: 500
      sasl.jaas.config: org.apache.kafka.common.security.plain.PlainLoginModule required username="ccloud_key" password="ccloud_secret";   (2)
      security.protocol: SASL_SSL

      # CCloud Schema Registry Connection parameter
      schema.registry.url: https://schema-registry.aws.confluent.cloud   (3)
      basic.auth.credentials.source: USER_INFO   (4)
      schema.registry.basic.auth.user.info: sr_ccloud_key:sr_ccloud_key   (5)
    consumer:
      group-id: group_id
      auto-offset-reset: earliest
      key-deserializer: org.apache.kafka.common.serialization.StringDeserializer
      value-deserializer: io.confluent.kafka.serializers.KafkaAvroDeserializer
    producer:
      key-serializer: org.apache.kafka.common.serialization.StringSerializer
      value-serializer: io.confluent.kafka.serializers.KafkaAvroSerializer
    template:
      default-topic:
logging:
  level:
    root: info
- Cloud bootstrap server
- Broker key and secret
- Confluent Cloud Schema Registry URL
- Schema Registry authentication configuration
- Cloud Schema Registry key and secret
- Note: Make sure to replace the dummy login and password information with actual values from your Confluent Cloud account.
To run this application in cloud mode, activate the cloud Spring profile. In this case, Spring Boot will pick up application-cloud.yaml configuration file that contains the connection to data in Confluent Cloud.
java -jar -Dspring.profiles.active=cloud target/kafka-avro-0.0.1-SNAPSHOT.jar
Interested in more?
If this tutorial was helpful and you’re on the hunt for more on stream processing using Kafka Streams, ksqlDB, and Kafka, don’t forget to check out Kafka Tutorials. Feel free to reach out or ping me on Twitter should any questions come up along the way.
To get started with Spring using a more complete distribution of Apache Kafka, you can sign up for Confluent Cloud and use the promo code SPRING200 for an additional $200 of free Confluent Cloud usage.
Did you like this blog post? Share it now
Subscribe to the Confluent blog


New with Confluent Platform 7.8: Confluent Platform for Apache Flink® (GA), mTLS Identity for RBAC Authorization, and More
This blog announces the general availability of Confluent Platform 7.8 and its latest key features: Confluent Platform for Apache Flink® (GA), mTLS Identity for RBAC Authorization, and more.


Convening With Data Streaming Engineers at Current 2024
We covered so much at Current 2024, from the 138 breakout sessions, lightning talks, and meetups on the expo floor to what happened on the main stage. If you heard any snippets or saw quotes from the Day 2 keynote, then you already know what I told the room: We are all data streaming engineers now.