[Webinar] How to Implement Data Contracts: A Shift Left to First-Class Data Products | Register Now
Creating a Serverless Environment for Testing Your Apache Kafka Applications
If you are taking your first steps with Apache Kafka®, looking at a test environment for your client application, or building a Kafka demo, there are two “easy button” paths you can consider:
Option 1: Run a Kafka cluster on your local host

Download Confluent Platform, use Confluent CLI to spin up a local cluster, and then run Kafka Connect Datagen to generate mock data to your local Kafka cluster. This is the workflow described in the blog post Easy Ways to Generate Test Data in Kafka.
Option 2: Use serverless Kafka in the cloud
![]()
Create a new stack in Confluent Cloud, fully managed Apache Kafka as a service, using the community ccloud-stack utility. Then use the Confluent Cloud CLI to deploy fully managed Kafka Connect Datagen to generate mock data to your Kafka cluster in Confluent Cloud. This is the workflow described in this blog post.
Using Confluent Cloud simplifies your development and test cycles by removing the need to operate a Kafka cluster. Additionally, when your application leverages serverless Kafka in the cloud, it is much easier to access data you may have in other cloud services by deploying fully managed connectors to pull data into or push data from Confluent Cloud.
Using a combination of the Confluent Cloud CLI and ccloud-stack utility, you can programmatically set up 100% of your Kafka services in the cloud. This blog post will show you how to:
- Create a Confluent Cloud stack
- Generate test data to your Kafka topics to more rigorously exercise your client applications
Create a Confluent Cloud stack
Let’s create a new Confluent Cloud stack of services. You may want a new stack so that it doesn’t interfere with your other work, or you may want it to be short-lived for testing or a demo. Using the ccloud-stack utility, you can spin up a new Confluent Cloud environment and services in a single command.
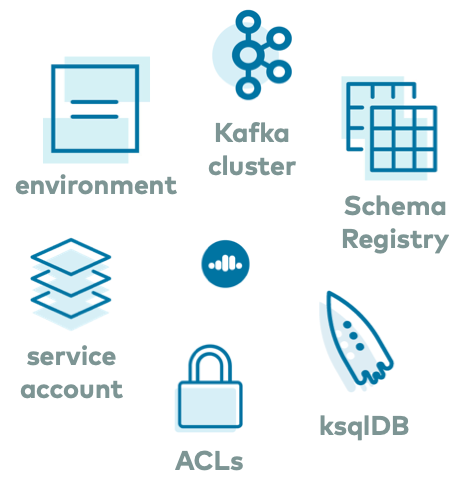
The ccloud-stack utility was developed by the DevRel team at Confluent with the goal of helping new users quickly get to doing interesting things with their applications (very useful for the automated demos we build too!). It provisions a new Confluent Cloud environment, a new service account, a new Kafka cluster (default cluster type is Basic, which is ideal for development use cases), and associated credentials. The ccloud-stack utility also enables Confluent Schema Registry and associated credentials, provisions ksqlDB and associated credentials, and adds ACLs for the service account. By simplifying the creation of these Confluent Cloud services into a single bash script, you can focus on your application development and testing.

If you don’t already have an account, you can sign up for Confluent Cloud using the promo code C50INTEG to get an additional $50 of free Confluent Cloud usage as you try out this and other examples.*
First, install the Confluent Cloud CLI onto your local machine, which is what the ccloud-stack utility uses under the hood. Confluent Cloud CLI is a production-grade command line interface to Confluent Cloud, and it is built and supported by Confluent. Whether you use ccloud-stack or not, you will want to have Confluent Cloud CLI to execute full CRUD operations on Kafka clusters and topics, Schema Registry clusters, schemas, and subjects, service accounts and their associated API keys and Kafka ACLs, creation and control of connectors, administration of ksqlDB apps, etc.
Usage:
  ccloud [command]
Available Commands: api-key Manage the API keys. completion Print shell completion code. config Modify the CLI configuration. connector Manage Kafka Connect. connector-catalog Catalog of connectors and their configurations. environment Manage and select ccloud environments. feedback Submit feedback about the Confluent Cloud CLI. help Help about any command init Initialize a context. kafka Manage Apache Kafka. ksql Manage ksqlDB applications. login Log in to Confluent Cloud. logout Log out of Confluent Cloud. price See Confluent Cloud pricing information. prompt Print Confluent Cloud CLI context for your terminal prompt. schema-registry Manage Schema Registry. service-account Manage service accounts. update Update the Confluent Cloud CLI. version Show version of the Confluent Cloud CLI.
After you have downloaded the CLI, log in to Confluent Cloud with the command shown below. When prompted, provide your Confluent Cloud username and password. The --save argument allows you to have long-lived authentication; it persists the credentials to a local netrc file to opaquely reauthenticate whenever the login token expires.
ccloud login --save
Next, follow the documentation to get the ccloud-stack utility from GitHub. There are two different ways to run the utility: either as a bash script or as a function from a library for automated workflows, but both boil down to running a single command. Optionally, set CLUSTER_CLOUD and CLUSTER_REGION to your desired cloud provider and region. For example, to create a ccloud-stack in GCP in the us-west2 region, you would run the following:
CLUSTER_CLOUD=gcp CLUSTER_REGION=us-west2 ./ccloud_stack_create.sh
In addition to provisioning all the needed Confluent Cloud resources and credentials, the ccloud-stack utility also creates a local configuration file with connection information to all of the above services. This file is particularly useful because it contains connection information to your Confluent Cloud instance that your Kafka application needs to know (see the following sections on how this is used). The file resembles this:
# ------------------------------
# ENVIRONMENT ID: <ENVIRONMENT ID>
# SERVICE ACCOUNT ID: <SERVICE ACCOUNT ID>
# KAFKA CLUSTER ID: <KAFKA CLUSTER ID>
# SCHEMA REGISTRY CLUSTER ID: <SCHEMA REGISTRY CLUSTER ID>
# KSQLDB APP ID: <KSQLDB APP ID>
# ------------------------------
ssl.endpoint.identification.algorithm=https
security.protocol=SASL_SSL
sasl.mechanism=PLAIN
bootstrap.servers=<BROKER ENDPOINT>
sasl.jaas.config=org.apache.kafka.common.security.plain.PlainLoginModule required username="<API KEY>" password="<API SECRET>";
basic.auth.credentials.source=USER_INFO
schema.registry.basic.auth.user.info=<SR API KEY>:<SR API SECRET>
schema.registry.url=https://<SR ENDPOINT>
ksql.endpoint=<KSQLDB ENDPOINT>
ksql.basic.auth.user.info=<KSQLDB API KEY>:<KSQLDB API SECRET>
Congratulations! You now have serverless Kafka ready for your development needs.
Note: If you don’t want to use the ccloud-stack utility and instead want to provision all these resources step by step via the Confluent Cloud CLI or Confluent Cloud UI, refer to the Confluent Cloud quick start.
Use your Confluent Cloud
Your Confluent Cloud stack is now ready to use. Let’s give it a test run by using the Confluent Cloud CLI to produce to and consume from a Kafka topic.
Create a topic called topic1:
ccloud kafka topic create topic1
Produce a sequence of simple messages:
seq 5 | ccloud kafka topic produce topic1
Consume those same messages from topic1 (press ctrl-C to stop):
ccloud kafka topic consume topic1 --from-beginning
Your output should resemble what is shown below. It’s normal for the sequence numbers to appear this way because the messages were sent to different partitions (but the order is maintained per partition).
 Starting Kafka Consumer. ^C or ^D to exit
 3
 4
 1
 2
 5
 ^CStopping Consumer.
Generate test data to your Kafka topics
To dive into more involved scenarios, test your client application, or perhaps build a cool Kafka demo for your teammates, you may want to use more realistic datasets. With Confluent Cloud, you can deploy fully managed connectors to connect to a variety of external systems without any operational overhead. This “Connect as a service” makes it easy to read data from end systems into Confluent Cloud and write data from Confluent Cloud to other end systems.
But what if you are not ready to integrate with a real data source? You can still generate interesting test data for your topics. The easiest way is to use the fully managed Datagen Source Connector for Confluent Cloud, which provides predefined schema definitions with complex records and multiple fields. It seamlessly integrates with Confluent Cloud Schema Registry, so you can format your data as one of Avro, JSON_SR, JSON, or Protobuf.

To use the Datagen connector, create a file with the connector configuration. Let’s call it datagen-config.json. Below is a sample connector configuration that uses one of the provided schema specifications to produce Avro records simulating website page views. The records will be populated with data as defined by a schema specification called PAGEVIEWS to a Kafka topic called topic2. Note that you have to specify the credentials API KEY and API SECRET to the Kafka cluster in Confluent Cloud. If you used the ccloud-stack utility, you can get this from the auto-generated configuration file.
{
    "name" : "datagen_ccloud_01",
    "connector.class": "DatagenSource",
    "kafka.api.key": "<API KEY>",
    "kafka.api.secret" : "<API SECRET>",
    "kafka.topic" : "topic2",
    "output.data.format" : "AVRO",
    "quickstart" : "PAGEVIEWS",
    "tasks.max" : "1"
}
Since auto topic creation is completely disabled in Confluent Cloud, so that you are always in control of topic creation, you will need to first create the topic topic2 before running the connector:
ccloud kafka topic create topic2
Then create the connector, passing in the file you created above:
ccloud connector create --config datagen-config.json
It will take a few seconds for the connector to be provisioned. Run the command ccloud connector list -o json to monitor the status of the connector:
[
  {
    "id": "lcc-pwggo",
    "name": "datagen_ccloud_01",
    "status": "RUNNING",
    "trace": "",
    "type": "source"
  }
]
Once the connector is in RUNNING state, you can consume those messages with the Confluent Cloud CLI:
ccloud kafka topic consume topic2 \
    --value-format avro \
    --print-key
Your output should resemble this:
…
481	{"viewtime":481,"userid":"User_7","pageid":"Page_75"}
491	{"viewtime":491,"userid":"User_2","pageid":"Page_92"}
501	{"viewtime":501,"userid":"User_2","pageid":"Page_39"}
...
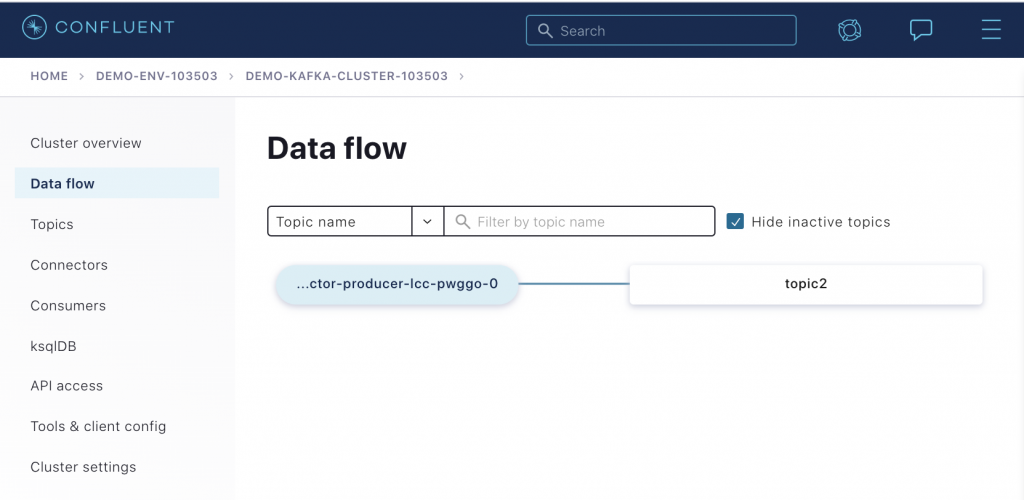
This blog post intentionally focuses on the Confluent Cloud CLI so that you can learn how to drive your workflows programmatically, but let’s detour briefly to the Confluent Cloud UI where you can visualize your data flowing through your cluster. Log in at https://confluent.cloud/, find your Kafka cluster, and select Data flow. You will see that there is a producer, i.e., the Datagen connector with the ID lcc-pwggo, writing data to topic2.

Defining what the data looks like
The example above used a predefined schema definition called PAGEVIEWS, which is one of several schema definitions available for use by the connector in Confluent Cloud. However, if the predefined schema definition that you want is not available, you can propose a new schema by submitting a GitHub pull request, and we can review its eligibility for adding it into Confluent Cloud. Or, you can run your own Kafka Connect cluster pointed to your Confluent Cloud instance, deploy the Kafka Connect Datagen connector, and specify your own custom schema.
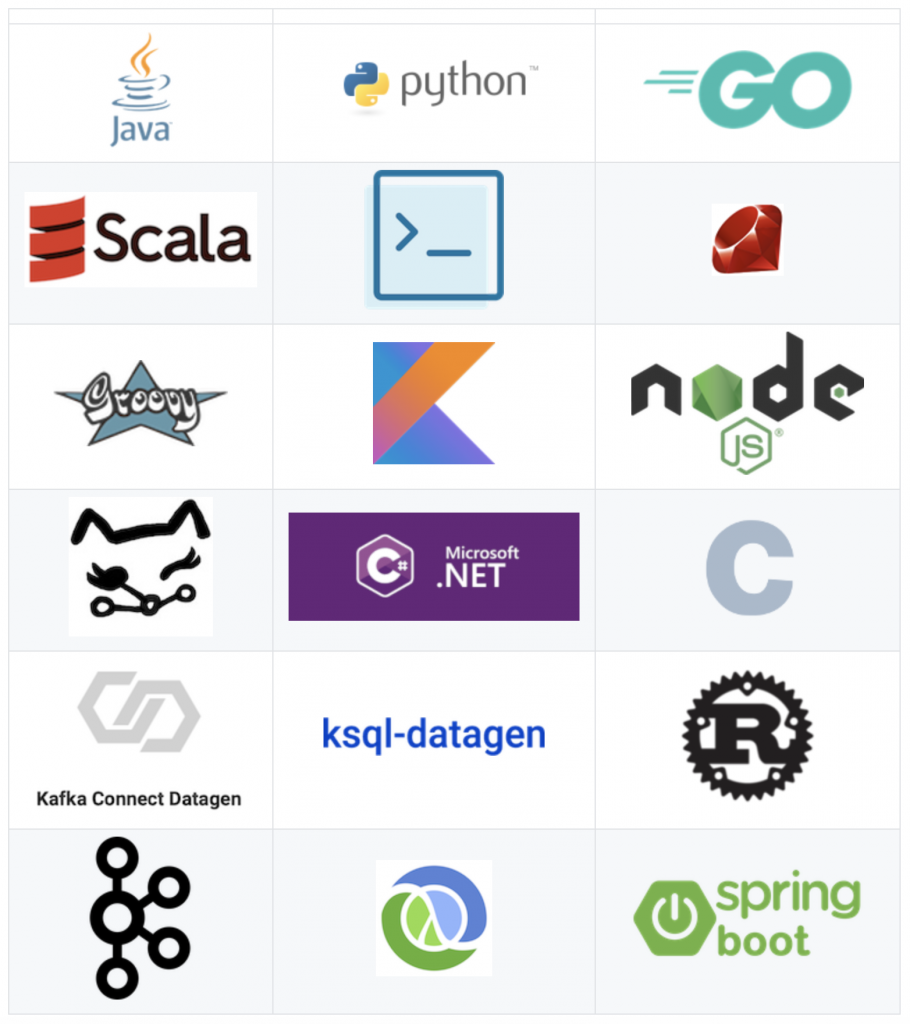
You may also write your own Kafka client application that produces whatever kind of records you need to do your testing. Kafka has many programming language options—you get to choose: C, Clojure, C#, Golang, Apache Groovy, Java, Java Spring Boot, Kotlin, Node.js, Python, Ruby, Rust, and Scala.

Ready, set, test your Kafka app on Confluent Cloud!
You have seen how to use the ccloud-stack utility to create a serverless Kafka environment and how to use the Confluent Cloud CLI to provision a fully managed Datagen connector to pre-populate Kafka topics for your applications to use. Now you’re ready to test your Kafka application! You can drive all of your Confluent Cloud workflow and build your own automated CI/CD pipelines with the Confluent Cloud CLI and REST APIs, in addition to sending queries to ksqlDB, testing schema compatibility, and more.
See this Kafka tutorial for a complete tutorial on how to run the Kafka Connect Datagen connector for Confluent Cloud. For a full explanation of all connector configuration parameters, see the documentation.
If you’d like additional examples of how to build applications with Confluent Cloud, you can also refer to the Confluent Cloud Demos documentation. All the examples there have automated workflows that you can use for reference in your environment. Plus, use the promo code C50INTEG to get an additional $50 of free Confluent Cloud usage as you try them out.*
Did you like this blog post? Share it now
Subscribe to the Confluent blog
Confluent and Amazon EventBridge for Broad Event Distribution
Learn how to stream real-time data from Confluent to AWS EventBridge. Set up the connector, explore use cases, and build scalable event-driven apps.
New With Confluent Platform 8.0: Stream Securely, Monitor Easily, and Scale Endlessly
This blog announces the general availability (GA) of Confluent Platform 8.0 and its latest key features: Client-side field level encryption (GA), ZooKeeper-free Kafka, management for Flink with Control Center, and more.

