Ahorra un 25 % (o incluso más) en tus costes de Kafka | Acepta el reto del ahorro con Kafka de Confluent
4 Must-Have Tests for Your Apache Kafka CI/CD with GitHub Actions
Millions of developers code on GitHub, and if you’re one of those developers using it to create Apache Kafka® applications—for which there are 70,000+ Kafka-related repositories—it is natural to integrate Kafka into your GitOps development and operational framework. This blog post assumes you understand the principles of GitOps, the value of continuous integration and continuous delivery (CI/CD), and the importance of promoting applications through staged environments (if you want a reprise, check out this resource). Here the focus is on applying GitOps principles to the development lifecycle of a Kafka client application using GitHub Actions: for testing locally and in Confluent Cloud, with and without Schema Registry, and for schema evolution.

Typically, developers set up their local environment with language-specific test frameworks like JUnit, pytest, and others that execute tests prior to checking in code, or they have cloud-based CI/CD pipelines that run tests after checking in code. These early stage tests must run quickly and easily:
- Unit tests validate isolated blocks of code with typically no external dependencies or connections to other systems. For Kafka unit testing, there is:
- MockProducer
- MockConsumer
- Rdkafka_mock
- TopologyTestDriver
- …
- Integration tests provide end-to-end validation with other services, and for this there is:
- TestContainers
- EmbeddedKafkaCluster
- …
The rub is that these tests use a mocked or local Kafka broker; they don’t use a real Kafka cluster, send records across a network, or test resiliency, complex failure scenarios, or schema evolution. For later stage application testing, it’s critical to test the actual client application by sending real messages to an actual remote cluster and validating the application end to end. But if you don’t run your own Kafka cluster, what do you do? If only there was a way to test the application against a real Kafka cluster in the cloud and seamlessly integrate it with the GitHub repo…
The Kafka community uses a variety of CI/CD tools including: GitHub Actions, Jenkins, CircleCI, Travis CI, and more. The blog spotlights GitHub Actions where developers can create their own workflows out of “actions,” which can be custom code or popular third-party code from GitHub Marketplace. This just scratches the surface of what GitHub Actions can do (we’ll leave it to the folks at GitHub Actions to further reel you in with richer feature descriptions and operational best practices), but here are a few example jobs to get started:
- Create an artifact for the client application
- Test against a local dev cluster
- Test against a cloud cluster
- Validate compatibility of new schemas
All the code shown in this blog post can be explored in more detail in GitHub in a fully functional workflow that looks like this:

Create an artifact for the client application
The first job of the example workflow builds an artifact available for use by downstream jobs in the CI/CD pipeline. The artifact in this particular example is a container image built from the checked-in client application code. At its simplest, the build job could do the following (it will vary greatly, use case to use case):
build:
runs-on: ubuntu-latest
permissions:
	packages: write
	steps:
		- name: Checkout repository
          uses: actions/checkout@v3
        - name: Log in to the GitHub Container Registry
          uses: docker/login-action@v2
          with:
            registry: ghcr.io
            username: ${{ github.actor }}
            password: ${{ secrets.GITHUB_TOKEN }}
        - name: Build and push Docker image for Kafka client app
        uses: docker/build-push-action@v3
        with:
          context: .
          push: true
          tags: ghcr.io/${{ github.actor }}/kafka-app:latest
Notice that each step uses pre-built actions that are publicly available on GitHub Marketplace, and as a result you don’t need to write any new code! Here is an explanation of what each one does:
- actions/checkout: Checks out the code from this branch into a unique workspace so the build job can access it. Without this action, the build uses the repo’s default branch.
- docker/login-action: Logs into GitHub Container Registry at ghcr.io (with permissions to push images to it), though this could have just as easily been Docker Hub. This action requires you to supply a username and password. In this example you don’t store the credentials in the file itself, but instead access them using automatic token authentication and variable substitution.
- docker/build-push-action: Builds, pushes, and tags a Docker image in the GitHub Container Registry. You can specify any additional steps to build it in an application-specific Dockerfile (example of a Dockerfile for a client app, Python in this case).
After the application image has been built and pushed to GitHub Container Registry, it is best to do a sanity test before passing it on down the pipeline. In this example, the newly published Docker image can be referenced at:
ghcr.io/${{ github.actor }}/kafka-app:latest
A quick sanity test runs against a simulated Kafka cluster with rdkafka mock provided by librdkafka. In this example, the application is a Confluent Python client, and the simulated cluster is activated by setting the parameter test.mock.num.brokers in the input file (see librdkafka.sanity.config). The success criteria of the sanity test varies with the application logic.
…..
- name: Run Kafka client app unit test
	run: |
    docker run -t \
               -v ${DEST_WORKSPACE}/configs/librdkafka.sanity.config:/etc/librdkafka.config \
                 --name my-kafka-app --rm ghcr.io/${{ github.actor }}/kafka-app:latest \
                 bash -c '/usr/bin/producer.py -f /etc/librdkafka.config -t t1'
Test against a local dev cluster
Once the sanity test passes, the next step is to run the application against a real Kafka broker. Confluent’s cp-all-in-one is a Docker Compose file stored in GitHub with the full Confluent platform that you can use for this purpose. There is a corresponding action in Marketplace, cp-all-in-one-action, that pulls that Docker Compose file and brings up a subset or all of the platform services, including the broker.

The following job calls the above-mentioned GitHub Action to spin up a Kafka broker. This time when running the application Docker container, the additional --net workspace_default argument interconnects the Docker container networks, allowing the client to reach the broker. And the input configuration file (see librdkafka.local.config) sets the bootstrap server parameter to the broker container. As before, the success criteria varies with the application logic.
…
	- name: Run Confluent Platform (Confluent Server)
      uses: ybyzek/cp-all-in-one-action@v0.2.1
      with:
        service: broker
	- name: Run Kafka client app to local cluster
      run: |
        docker run -t \
                 -v ${DEST_WORKSPACE}/configs/librdkafka.local.config:/etc/librdkafka.config \
                 --net workspace_default \
                 --name my-kafka-app --rm ghcr.io/${{ github.actor }}/kafka-app:latest \
                 bash -c '/usr/bin/producer.py -f /etc/librdkafka.config -t t1'
Test against a cloud cluster
Once you verify that the application works against a local cluster, the next step is to validate it in a more production-realistic environment—a cluster in Confluent Cloud. If there are different cloud environments that separate development, staging, and production, configure the workflow to trigger appropriately based on the stage of testing.

This becomes especially powerful if you’ve adopted the GitOps environment-as-code practice in which different GitHub branches contain the canonical source of truth that define different environments, and an application can be promoted between environments as it passes all its checks. Workflows trigger when a specific event occurs, such as creating a commit, creating or merging a pull request, etc. For example, any commit to a branch could trigger a test in a development environment, creating a PR against another branch could trigger a test in a staging environment, and merging a PR could trigger deployment to production.
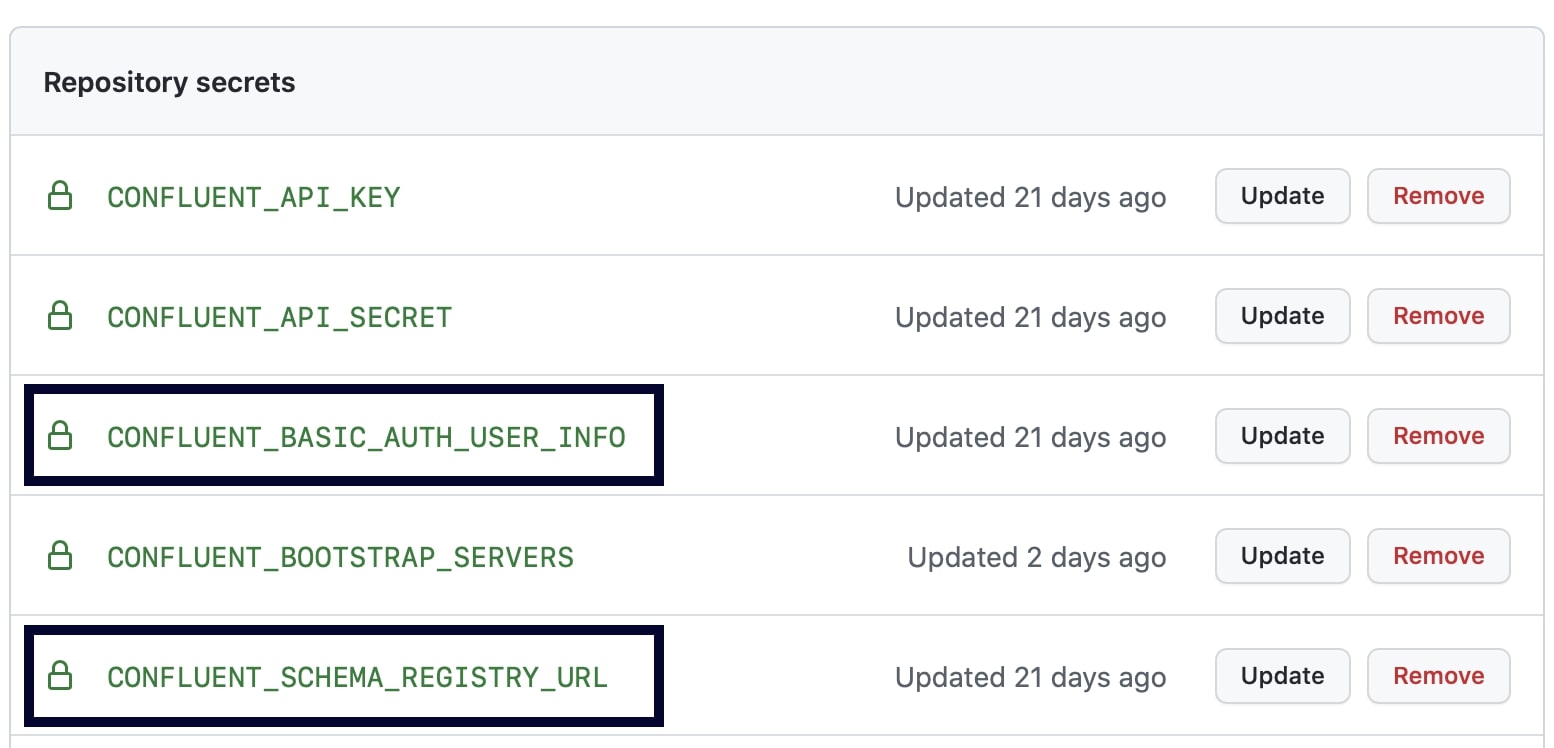
Regardless of which environment you’re using, the critical question is how to protect sensitive information such as credentials to the Confluent Cloud cluster. Absolutely never commit the credentials into the code base, even in private GitHub repositories. Instead, store those credentials separately as encrypted secrets, a GitHub feature which uses a sealed box to encrypt credentials even before they reach GitHub and keeps them encrypted until used in the workflow.
There are three encrypted secrets required for the client application to connect to Confluent Cloud: key, secret, and bootstrap servers.

Identify the secrets in the environment section of the workflow.
….
env:
  CONFLUENT_BOOTSTRAP_SERVERS: ${{ secrets.CONFLUENT_BOOTSTRAP_SERVERS }}
  CONFLUENT_API_KEY: ${{ secrets.CONFLUENT_API_KEY }}
  CONFLUENT_API_SECRET: ${{ secrets.CONFLUENT_API_SECRET }}
In order for the Kafka client application to use them, the credentials must be set in environment variables and referenced in the input file passed into the application. Again, since that sensitive information is not stored directly in the code, the input file such as librdkafka.ccloud.config references the credentials only by the names of the environment variables as set above. Anyone browsing the code in the GitHub repository would see only the variable names, but not their values.
bootstrap.servers=${CONFLUENT_BOOTSTRAP_SERVERS}
security.protocol=SASL_SSL
sasl.mechanisms=PLAIN
sasl.username=${CONFLUENT_API_KEY}
sasl.password=${CONFLUENT_API_SECRET}
During the execution of the job, the action franzbischoff/replace_envs does in-place substitution of those variables, and because they were registered as secrets, they are redacted in the workflow logs.
   - uses: franzbischoff/replace_envs@v1
        with:
          from_file: 'configs/librdkafka.ccloud.config'
          to_file: 'configs/librdkafka.ccloud.config'
          commit: 'false'
For the test that runs the application to Confluent Cloud, the job just needs to specify the right input file but otherwise it runs in the same way as before.
	- name: Run Kafka client app to Confluent Cloud
	run: |
          docker run -t \
                 -v ${DEST_WORKSPACE}/configs/librdkafka.ccloud.config:/etc/librdkafka.config \
                 --name my-kafka-app --rm ghcr.io/${{ github.actor }}/kafka-app:latest \
                 bash -c '/usr/bin/producer.py -f /etc/librdkafka.config -t t1'
After the Python application produces messages to Confluent Cloud, you should validate that the messages were written and are properly deserializable. This could arguably be easier with a Python consumer application but sometimes a quick check with the Confluent CLI is all you need. While an administrator logs into the CLI with her user email address and password, how does this work for CI/CD workflows? For automation, use a context, which supports service account credentials without logging in. The following example runs a Docker image with the Confluent CLI, creates and uses a new context, and then consumes messages (customize the pass/fail criteria to make sure your application logic is working):
docker run -t \
       -e CONFLUENT_BOOTSTRAP_SERVERS=${CONFLUENT_BOOTSTRAP_SERVERS} \
       -e CONFLUENT_API_KEY=${CONFLUENT_API_KEY} \
       -e CONFLUENT_API_SECRET=${CONFLUENT_API_SECRET} \
       --name confluent-cli confluentinc/confluent-cli:2.16.0 \
       bash -c 'confluent context create context-test \
             --bootstrap ${CONFLUENT_BOOTSTRAP_SERVERS} \
             --api-key ${CONFLUENT_API_KEY} \
             --api-secret ${CONFLUENT_API_SECRET} && \
             confluent context use context-test && \
             timeout 10s confluent kafka topic consume -b t1’
Validate compatibility of new schemas
If the deployment scenario requires Avro, JSON, or Protobuf formatted data, the application should be validated with Schema Registry.
For early stage local testing, run with the cp-all-in-one GitHub Action again but set service: schema-registry to also bring up Schema Registry. For later stage testing with the fully managed Schema Registry in Confluent Cloud, add two additional encrypted secrets into GitHub: Schema Registry credentials and URL.

Follow the same steps as shown earlier to set the environment variables and call the action to do variable substitution on the input configuration file. A new job can now validate that the new application creates a real schema in Schema Registry and writes properly formatted Avro, JSON, or Protobuf records.
Uh oh, two months after going to production, business requirements have changed and you discover that the schema needs to change to carry additional (or fewer) fields. This schema evolution is expected—schema evolution is part of lifecycle development—but CI/CD pipelines need to ensure the new schema is compatible with the old schema before promoting the new one. Otherwise, the contract between the producers and consumers may break, and consumers may not be able to read the records written by the producers.
The Schema Registry has a REST API that can be flexibly used from the command line, but there are also language-specific capabilities that are more streamlined for application development. For example, Python has a package that provides a built-in compatibility checker schema_registry_client.test_compatibility() as demonstrated in this code, and since it is just Python code it can be called in the same way as the previous jobs. A Java shop can use a similar method SchemaRegistryClient.testCompatibility(), or alternatively take advantage of the test-compatibility goal in the Schema Registry Maven Plugin as configured in this pom.xml. This plugin can then be called in a job:
…
	- name: Set up JDK 11
      uses: actions/setup-java@v2
      with:
        java-version: '11'
        distribution: 'temurin'
        cache: maven
	- name: Test compatibility of a new schema
        run: |
          # Pass
          mvn io.confluent:kafka-schema-registry-maven-plugin:test-compatibility \
            "-DschemaRegistryUrl=$CONFLUENT_SCHEMA_REGISTRY_URL" \
      "-DschemaRegistryBasicAuthUserInfo=$CONFLUENT_BASIC_AUTH_USER_INFO" \
            "-DnewSchema=schemas/Count-new.avsc"
This checks compatibility of a new schema (in this example, the new schema is defined locally in the file schemas/Count-new.avsc), against the schema related to the subject that is already registered, so it requires connecting to Schema Registry and passing in valid credentials. However, with Confluent Platform 7.2.0 or later, there is a new goal test-local-compatibility that enables checking compatibility with locally stored schemas, which can be used as a quick sanity check earlier in the development cycle without ever registering a schema.
Congratulations, that’s quite the pipeline! Now every time you commit code, the workflow automatically validates the application works in Confluent Cloud, and every time the schema needs to evolve, the workflow automatically checks compatibility of the schema against the previous version.
Next steps
The GitHub Actions workflow described in this blog post showed how to transform the development and testing of Kafka client applications with a CI/CD pipeline: build a Docker image with the application code, validate it with cp-all-in-one and in Confluent Cloud, and check schema compatibility as schemas evolve. From here, extend the pipeline in any way to suit the application to your deployment scenario, and explore other applications of GitHub Actions, like performing tasks that other bots do today, issue management, notifications, etc.
Additionally, if you’re using ksqlDB and want to learn how to evolve running queries and validate them using GitHub Actions, follow Zara Lim’s tutorial at Online, Managed Schema Evolution with ksqlDB Migrations.
¿Te ha gustado esta publicación? Compártela ahora
Suscríbete al blog de Confluent
Introducing KIP-848: The Next Generation of the Consumer Rebalance Protocol
Big news! KIP-848, the next-gen Consumer Rebalance Protocol, is now available in Confluent Cloud! This is a major upgrade for your Kafka clusters, offering faster rebalances and improved stability. Our new blog post dives deep into how KIP-848 functions, making it easy to understand the benefits.
How to Query Apache Kafka® Topics With Natural Language
The users who need access to data stored in Apache Kafka® topics aren’t always experts in technologies like Apache Flink® SQL. This blog shows how users can use natural language processing to have their plain-language questions translated into Flink queries with Confluent Cloud.
